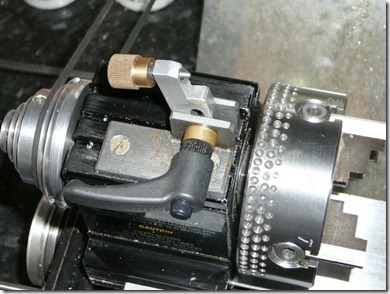
“Here's what I made so that I could mount my dial indicator on the headstock arbor. Using this I'm able to get the variance of the milling attachment to less than .001 easily.
The unit is simple to make: Use a blank arbor, drill halfway through with cut down 1/2 inch drill (available at any hardware store. I drilled and tapped a 10-32 hole to take a SHCS. Since you're not turning on the lathe with this in place it isn't important how long the screw is.
For the holder itself, II used a piece of 1/2" 12L14 stock about 3 inches long. I used a 3/8" mill and the milling vice to cut down both sides so the finished size is about 1/4" thick. The reason for this is to allow the dial indicator plunger and dial to clear the holder.I drilled a 1/4" hole in the end.
To use this, mount the dial indicator with 1/4-20 bolt and nut, then slide the holder into the adapter.and tighten down the set screw. Screw the adapter onto the headstock arbor. Put the work piece into the milling vice and move the cross slide down so that the indicator goes around at least once. Crank the cross slide until one side of the work piece is indicating and gently tighten the rear milling adapter screw. Crank to the other side of the work piece and note the difference in readings.
Then I simple twist the milling attachment so that the indicator reads 1/2 the difference. I keep moving the cross slide back and forth, adjusting out the variance until there is no movement of the indicator needle. Then I tighten down both milling attachment screws evenly and recheck the variance. The first couple of times you will probably need to loosen the screws and adjust again, but it works better than any other way I've tried. I can get a repeatable 0.0005 cut on the milled pieces when cutting grooves.”
Tuesday, January 18, 2011
Steve Fornelius' Indicator Attachment
Monday, January 17, 2011
Ron Kiely's Toolmaker's Vise
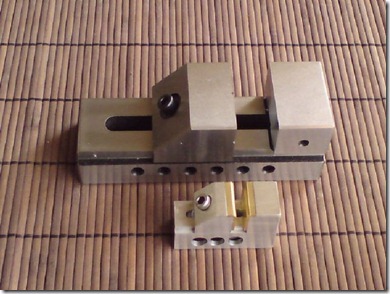
“I’ve had a rest from doing bicycle lights for a bit and after seeing Dean’s home made tool maker’s vice. I thought I’d have a go at making a mini version. So out came the vertical slide for the lathe and in the end it all turned out nice and square. I fitted some brass jaws as it will be used for making jewellery so soft jaws won’t mark the work. All turned out well thanks to the vertical slide the pictures should speak for themselves.”
Sunday, January 16, 2011
Peter Zicha's Taig Mill and Projects
“This is my Taig CNC mill as of today.”
”I am starting to do the manual electric drive & CNC drive retro fit on both units machining parts . I made some 3/4 inch base risers for both units . one mounted and the other waiting for its partner in the mail . “
Saturday, January 15, 2011
Guy Zattau's Taig CNC Mill Limit Switches
“Here's some pics of the setup and the limit switch arrangement with no holes drilled in the mill. The white things are the trippers and the run close to the brackets that hold the micro switches.”
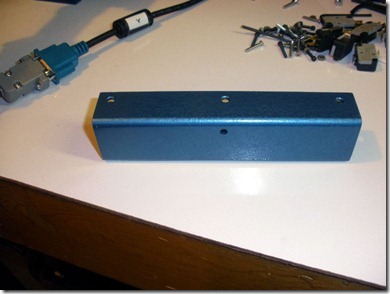
Here are the pics of the mill limit switch brackets before being installed. #'s 1, 2, 3 are the X axis that mounts on using the holes for the rubber way protector. It mounts using the two end holes with access holes thru the top for an allen wrench. The rubber is sandwiched in between. The slot is 3/8" by 1/2" and the relief for the post is 3/8". Material is 1 3/4" x 1 3/4" x 6 1/2". I used .080" but it's a little too thick and makes it hard to get the trip levers to actuate the micro switches.
“Z, made from 1" x 2" x 7 1/2" x .058". It is mounted using the holes tapped in the vertical axis post that mounts the power switch. Compression posts made of tubing sleeve the holes. Holes on the part next to the post are clearanced for the screw and the ones on the outside are just big enough for the tubes to pass and finish up flush.”
“the Y axis, made of 1" x 1" x 8" x .058" with two brackets. The brackets are 2" tall with a 1 5/8" foot, 1" x 1 1/2"
wide. The micro switches are approximately 1" x 3/4" x 1/2" and are mounted with 4-40 countersunk screw so the moving parts clear. The trip devices are made of a Teflon like material machined to ride on the moving component just off the surface of the brackets and tripping the actuator lever of the micro switch. It may be necessary to add a piece of shim stock to the lever to make them work, I used .030, glued to the lever with epoxy. “
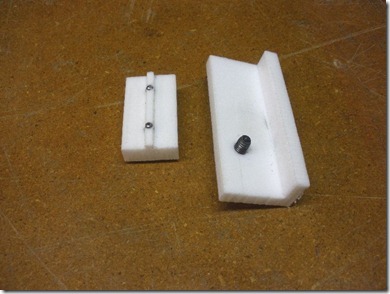
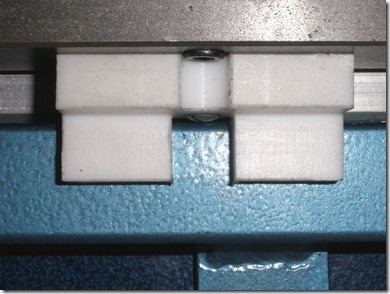
Here are the pics of the microswitch trip pieces for the mill. The Z is a simple angle piece with a small ramp cut at the top so it can allow the Z axis to go to the limit. X was made as one piece, then cut in half. Drilled the holes first then milled away the sides to leave a ridge. The ridge centers the part and prevents the screws from marring the groove in the table. Cut the 4-40 allen screws to length so they don't bottom against the back of the nut retainer slot in the table. The Y is a piece of work and difficult to get off as it is necessary to remove the microswitch bracket first. The drawing that is enclosed with the copy's I sent you is probably more understandable that what I can write. It's a goofy design but the best I could come up with at the time. All the material I sent you is just meant to be an idea and not an exact blueprint. Everyone should make their own measurements. The main theme was to not drill any holes in the machine, just use the existing ones.
Friday, January 14, 2011
Monty Remon's Taig Lathe Mods, Part 5
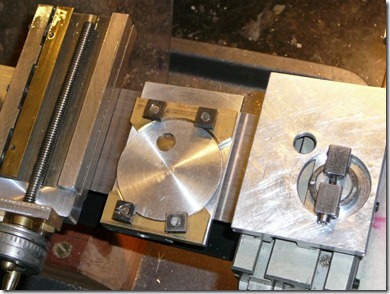
“We all suffer from trying to clamp the compound slide securely, so much force your fingers turn red and the little annular dovetail arrangement can't hack it and then the air turns blue! I fitted additional stops it the 'T' slots as I had seen on your (Nick) site and was contemplating trying the additional clamping slot in the body I'd seen there too. Well, I laid all the compound slide components out gave them a severe looking at and even with a cup of tea the solution (groan) never came, only a general direction. I had a piece of 1/2"x2"x3" alloy for the body, ok, for a 2" diam., annular dovetail! Next. A look at the end section revealed a few problems, the Taig body measured 0.435" thick, if 0.125" is taken off for the dovetail clamping there is only .060" metal remaining, to copy the 'U' channel arrangement only 30 thou left, not very stiff! However drilling down the middle then milling out a slot to house the split nut will retain rigidity. Great. I decided on drilling the 1/4" hole 1st., I attacked it from both ends, and met it the middle with no binding. The split nut housing presented no problems, just mill and drill.
Because as much metal as possible was req'd to chuck the work piece securely, turning down the the base to make a 2" diam., cylinder that is 0.130" deep, then under cutting at 45 degs was the next job, it was as entertaining as always mounting the work in the 4JC.”
The dovetail milling was next. I slipped a piece of steel rod through the appropriate 1/4" hole in the work piece and clamped down on this giving myself 1/2" clearance for the cutter. This was to be my first attempt at machining a dovetail in anger but my dovetail cutter was too small so I had to do it in stages, the profile is not correct but at least at least it turned out be an accurate cock-up that proves I am on the right track. (If I take the nose of one of my gib plates then I have good contact.)
“Next job, for the two brass clamps I used 1/8"x3/4" but would recommend that 1/8"x 1" is used so that the locating c/s screws can be positioned clear of the turning. Production turned out to be easy. The brass plates were bolted on to the face of a piece of 1/2"x2"x3" and set up in the 4JC. I turned the plates to get 1 3/4" diam., recess then switched to a 45 deg., cut, removed one piece and tried the fit - close but not enough. Bolted back in place, a deeper cut was taken then the same piece removed and tried for fit again, close enough! The clamps were removed and the holes c/sunk on the back side, deep enough to ensure that they are recessed. The clamping assy., must have less depth than the circular seating to make sure that the base is clamped to the xslide surface. Tickle with a file if req'd.
The only short coming with the system at the moment is easy location and locking on the top slide, readers may come up with a neat solution before I do. At the moment I can only locate and lock at either end of the xslide. The system req'd I drill and tap either end of the top slide between the 'T' slots and use a bolt and washer to apply the clamping force on the loose clamp. To set up the clamps are located in the 'T' slots and the screw/ washer assy., set a 1/4 turn out, the end clamp locked against this. The compound slide is seated against this end clamp and the other clamp seated against the slide and locked, the end clamp is then slackened off a touch the compound slide set to the req'd angle and locked using the end screw.”
Monty Remon's Taig Lathe Mods, Part 4
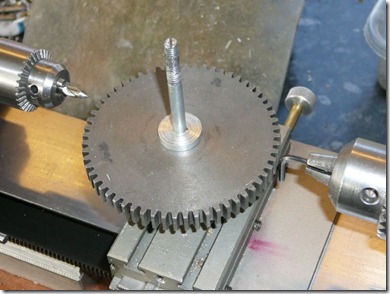
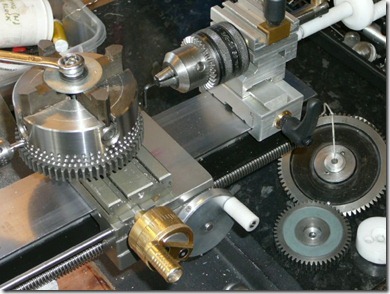
“Following a need to change the range of divs., on my pulley mounted disc type indexing plate I was contemplating a peripheral arrangement, a sort of drum extension fitted on the pulley, but I required 3 rows of holes and it was apparent that there would only be room for two, and as I did not have any large diam., metal to hand the back burner beckoned this project. Then while downing another cup of tea the solution (pun?) appeared, three inches from the problem! It was the band of metal at the rear of the 4J chuck. Ok so I had the Where, now the How. I elected to have 50,60 and 72 div., and obtained some gear wheels with teeth to suit. I turned some clamp able mountings out of acetal, the height to suite the gear/chuck height req'd with a small spigot to fit each gear and a captive retaining bolt. Each gear has a short spigot to match the 4J registry. A centre drill is mounted in a head stock chuck, this is lined up with the captive bolt with this using the x slide, lock the x slide. The hex key was mounted in the tailstock chuck, select a size that sits between the teeth and does not bottom. Make sure the gear teeth are clean. Disconnect the drilling lever. For each series of holes the gear is kept in register by the stepped adaptor and double sided sticky tape - forget this at your peril. One important check, rotate the chuck by hand to ensure there is no wobble in the stacked assy.. (One of my gears was sawn from stock not turned, it looked like my wife's sliced bread!!)
I elected to start with the middle row of holes (X60).
Setting up procedure. Touch chuck to drill and back off 1/2" from drill. Slacken gear/chuck nut, slacken ram clamp, move tailstock assy., up to the carriage and lock. Hand feed the hex key/chuck into the gear teeth, this will align the gear radially and the hex key vertically at the same time, clamp both.
Switch on. Wind the carriage left and drill the 1st., hole to req'd depth, set the carriage stop. Back off, slacken off nut, right carriage to index next gear tooth, tighten nut, carriage left - drill second hole, back off, slacken off - - 58 to go. Ready for that next cup of tea?
The same procedure for the other gears, just remember the correct thickness packing for the corresponding gear to locate the ring of holes on the chuck.”
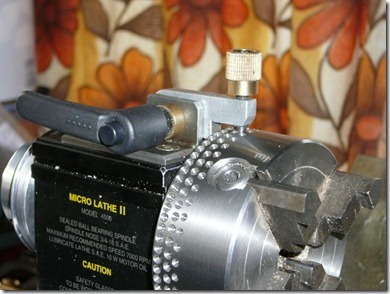
“The sliding lever assy., is more or less self explanatory. The asymmetric mounting footprint was to cater for other items to be fitted to the head stock. The bracket assy., was made from 1/8" steel angle, like wise the flying clamp part, both of these components were crimped in a vice to key the inner faces. The slotted lever is from 1/4" alloy, and the slot long enough to slide across the three rows of holes. This clamping method was found strong enough to support the weight of the lathe! Move your clamping hole 1/4" to the left (ref., my pics) and extend the lever by the same amount, you can see in the pics that one of my mounting bolts is under the lever, OOPS!
The only downside so far - I can't index using chucks or collets. YET------. Now where is that cup of tea?”
Monty Remon's Taig Lathe Mods, Part 3
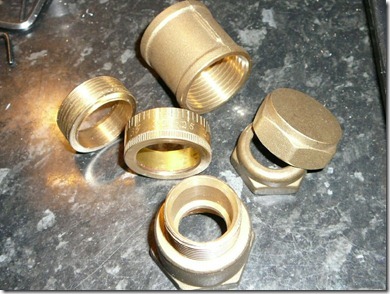
“Does anyone out there in Taigland suffer from or remember the black fingers, friction burns, shortness of breath and finger cramps from over enthusiastic operation of the standard xslide dial? Well after a few months (that long!) I resolved to make life easier with a larger spinning handle, mounted on a long strap across the end of the Taig dial using two bolts to increase the swing. Standard stuff, a piece of 1/2" diam., brass and some 1/8x1/2" brass strip a bolt and 2 c/sunk screws, dump the original knob. Well I hung my first handle on loosely then did my usual, made a cup of tea. It was returning to the results of my endeavours that was fortuitous because what I saw was the GAP under the handle! and I visualised the flange of a sleeve restrained by it. Well I had worked out where to get the metal for the sleeve before the screws were out. I had some large diam., brass plumbing fittings for that rainy day, you can find them in a DIY store, don't cost more than a beer. Sleeves, step downs, flanges and blanks, all are ideal because you don't need to remove much metal. I turned down the flange face first, then internally 1/8" less than the Taig dial diam.. The division markings and finger grips were next. The sleeve was parted off at Taig dial thickness plus the flange depth. Turn the job round in the chuck to bore out the inside to clear the \Taig dial for depth and diam.. Depending on the type of fitting you started out with you might only need to take the tops off the threads. Not much swarf then. The only other component is a packing washer that fits the hole in the flange with clearance holes for the two screws. Friction can be tweaked by backing the disc or the back of the arm with stiff card. Well it worked for me, just a few hours work, and it has to be cheaper than fitting a Sherline part. OOPS! I nearly forgot use a scrap piece of sleeve split or shrunk on as the index marker.”
Thursday, January 13, 2011
Monty Remon's Taig Lathe Mods, Part 2
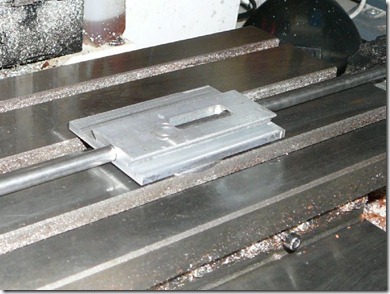
“I have 2 different copying systems for thread cutting plus a dedicated(?) threading system under developement, and have actually only cut 5 threads in anger!!!! The first was very simple copying system, consisting of 1/4" alloy bracket mounted on the carriage just clear of the x slide. A pivoting 1/2" square brass block tapped with 2 different target threads was mounted at the top, a sample of the target thread in rod form was screwed to the work piece, this attachment point was machined away after the thread was cut. I found a similar system on your site but it used a flexi plate or a bendy rod mounted on the x slide? Not wanting stacks of gears, shafts, levers and lead screws I did more research. I got confused by the Knaell systems, but liked the Keith Brooke copying method, I could understand that and had visions of slowly producing parts over weeks, so I made a start on the plate that fitted to the front of the carriage and then stopped! Time for a coffee, I then gave the whole lathe a severe looking at for half an hour and decided I was straying from the strait and narrow (PUN?)! I laid two lengths of 1/4" diam.,rod on the bed poking through the space in the headstock the Taig designers thoughtfully placed there for me, and measured a clearance of 4" diameter, enough to chuck 3.3" diam., work. A simple arrangement was arrived at to get from the clamp able mounting block made from 1"x1" scrap box alloy, through the guide assy.,(two 1"x1/4" scrap brass) clamped to the headstock and on to the carriage mounted plate. A piece of 1/2"x1/2" alloy is bolted on a vertical face of the clamp block and used to mount the thread magazine. The magazine is an off cut of 1 5/8" diam x 1/2" delrin with the target threads drilled and tapped at 45deg., stations. My scrap box is taking a beating. It's all been too easy so far, a bit of drilling, reamer work and tapping, sawing and threading and milling if you want to. Knowing that two 1/4 rods side by side are not as stiff as one 3/8" I elected to forget the drill chuck for target thread holding and try to get within 2" of the pulley assy., to reduce the bending forces. I made several dedicated male thread followers that clamp a through the spindle rod in place via the collet taper. The tpi range I selected are 18,20,22,24,26,28,32, & 40. The system worked well, a definite smug factor when I produced my first engine crank case back plate. A couple of points to note, the two guide plates are mirror image, the hole location was worked out to give 1/32" over the lathe bed and the same side clearance. The guide plates were machined as one and then used to machine the holes in the clamping block and the connecting plate for accuracy. When setting up the guide block assembly fit the clamping block to the l.h. end of the rods and position the carriage near to the headstock, tighten things up, now any alignment errors can only decrease and the system should not bind. The guide assy., can be left clamped in place, the carriage plate bolts were slackened off a flat, the rods finger tightened and then the plate locked? Not counting the bolts this gadget can be made with 10 simple parts and two of those are rods.”
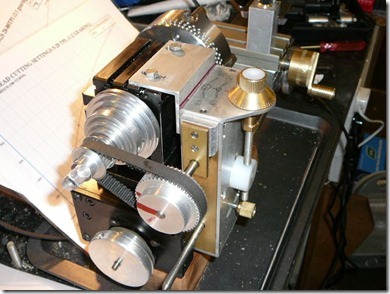
“Now the other system, my Thread Box. It has not been a labour of love, more a pain in the backside, too much coffee and head aches over a six month period, but I'm at the MK 2 version. It is the mounting system that I've yet to sort out. Basically it is just a box (HA!)that is bolted to the head stock and the output rod connected to the carriage. The input shaft is driven by a gear or toothed belt mounted on the end of the pulley. The drive of 2:1 ratio can be swapped round to 1:2 ratio, this gives two ranges but infinitely variable pitch selection within each range, at the moment this version has a 5 to 80 TPI range (5-20+ 20-80), a design change could make this 10 to 160 easily. To cut a thread just dial it in, the settings are obtained from a chart, METRIC? B.A? A.N.F? CLINGON? M.E.. NO PROBLEM, I YOU CAN SPELL IT YOU CAN CUT IT. The down side- you can't cut rod lengths but a cut of 1/2" to 1" depending on the range selected is ok.”


